DayZ Base Building Guide
Learn the essentials of DayZ base building - resources, shelters, watchtowers, flag poles, fences, platforms, gates, locks, and protection upgrades.
Base Building Overview
A strong base is not just about walls. Location, layers, storage, and persistence all matter. Before you start building, it helps to understand the basic crafting flow.
Choose a Smart Location
Good bases use terrain, buildings, and limited entry points to make raids harder. Avoid obvious high-traffic areas unless you are ready to defend them.
Build in Layers
One wall or gate is rarely enough. Airlocks, multiple fences, and locked storage areas help slow down raiders and reduce losses.
Protect Persistence
Flag poles refresh the lifetime of nearby base structures and containers, but smaller bases may not need one if you regularly interact with your storage.
Base Building Resources
Core material conversions you’ll use constantly while building.

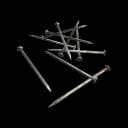
Nails Are the Main Bottleneck
Nails are needed for crates, frames, walls, platforms, stairs, and watchtower upgrades. If you are planning a base, always collect more nails than you think you need.
Larger towns are often more efficient to search because they have more possible spawn points.
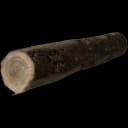
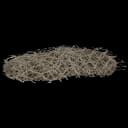
Logs vs Lumber Piles
Lumber piles are usually better for preserving saw durability, but transporting planks can be annoying without a vehicle or large backpack.
Use iZurvive filters to look for lumber piles near your base area. They can save a lot of tool durability and reduce how many trees you need to cut near your base.
For smaller bases, cutting logs near your build location can still be practical, especially if you have sharpening stones to repair your tools.
If your tools keep wearing out while gathering, check the DayZ repair guide to see which repair items are worth saving before a long building run.
Material Condition Does Not Change the Build
Damaged nails, planks, metal sheets, and tools can still create a full-health structure once construction is completed.
The item condition affects the item itself, but it does not make the finished wall weaker.
Where to Find Building Supplies
Most base-building supplies are worth searching for in industrial and farm locations. Check factories, storage containers, sheds, warehouses, barns, garages, and construction-style areas.
Nails, rope, wire, tools, sheet metal, pliers, and sharpening stones are all worth collecting early if you plan to build.
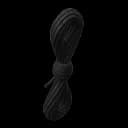
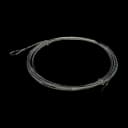
Need Rope?
Rope is used for fence kits, watchtower kits, flag pole kits, and shelters. If you cannot find rope, cut clothing into rags and combine 12 rags to craft rope. You can find more early-game recipes in the DayZ crafting guide.
Best Tools for Base Building
Using the right tool for the right job saves durability and keeps your build from draining supplies faster than needed.
| Job | Best Tool | Why It Matters |
|---|---|---|
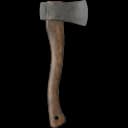
Chopping Logs | Firefighter Axe / Splitting Axe | Better for gathering logs because larger axes preserve more value from sharpening stone repairs. |
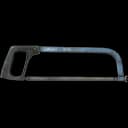
Sawing Planks | Handsaw / Hacksaw | Both are useful for making planks. Lumber piles are usually more tool-efficient than cutting logs into planks. |
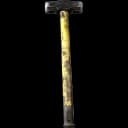
Hammering & Repairing | Hatchet | One of the best all-around base tools because it can hammer, repair, chop, and dismantle. |
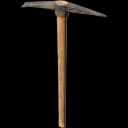
Digging Fence Posts | Farming Hoe / Pickaxe | Useful for placing or removing fence posts. Save pickaxes if you also need large stones. |
Dismantling | Crowbar | Best saved for dismantling so you do not waste your hatchet durability. |
Mining Large Stones | Pickaxe | Best option for large stones needed for flag poles and stone ovens. |
Tool Efficiency Tip
Try not to waste your best hammering tool on dismantling or your best melee tools on gathering stones. Base building gets expensive fast when you burn through tools on the wrong jobs.
Shelters
Quick shelter kits and full shelter builds for early storage, hidden camps, and temporary survival setups.

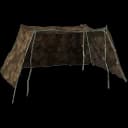

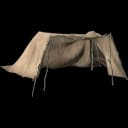
Storage Options
Use compact storage for small bases and larger storage options when you have the space to protect them.
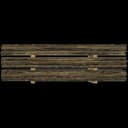
 Sea Chest
 Barrel
Sea chests and barrels are great compact storage options for smaller building bases.
Storage Tip
Small bases should prioritize crates, barrels, and sea chests because they fit into tighter rooms. Larger groups can use tents, but they need more flat space.
Watchtower
Build the kit first, then upgrade floors, stairs, walls, and roof for vertical defense and storage.

Best for Open-Space Bases
If you are building in an open area, watchtower-style walls can be stronger than simple fence walls because they are harder to jump over and can be built taller.
Two full wall heights is a safer target for open bases. Going much higher can become expensive and may not always improve protection enough to justify the cost.
Watchtowers Can Create Buffers
Watchtowers can also be used as exterior buffer structures around building entrances, giving raiders another layer to deal with before they reach your main storage.
This works well when you want to turn a building entrance into an airlock or create a stronger outer shell around a weaker interior base.
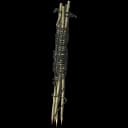
Flag Pole
Build a base, support it, finish the pole, and raise a territorial flag for long-term base persistence.


How Flag Persistence Works
A raised flag refreshes nearby base structures and containers within its territory. This is mainly useful for large bases, shared bases, or players who may forget to interact with storage.
For smaller bases, a flag pole is optional. Regularly interacting with your storage can refresh item lifetime without needing a flag.
Flag Poles Are Expensive and Visible
Flag poles require large stones, logs, rope, metal wire, nails, and several tools. Do not rush one unless your base is large enough to justify the cost.
A flag pole can also make a hidden base easier to spot, so weigh the persistence benefit against the risk of giving away your location.
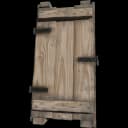
Fences & Protection
Fence base → frames → walls → protection upgrades. This is the core of most player-made bases.

Wood vs Metal Walls
Metal walls are better against melee and firearm damage, but do not assume they solve every raid threat. Explosives are still extremely dangerous.
Protect Exposed Frames
Fence frames can sometimes be exposed from above, below, or on sloped terrain. If raiders can damage the frame directly, they may avoid fully destroying the wall panel first.
Space Out Your Layers
Layered fences can slow melee and firearm raids, but layers placed too close together may still be hit by the same explosive blast.
Fence Platform & Stairs
Adds height and movement options to your fence line, making it easier to defend or navigate your base.
Platforms Are Utility, Not Armor
Platforms help with peeking, movement, and defense angles, but they do not make the wall stronger or stop players by themselves.
If you need cheap elevation inside your base, a stone oven placed near a wall can sometimes help you peek or climb without spending as many resources on platforms.
Gate & Defense Upgrades
Add gates, locks, camo, and barbed wire to slow raiders and make your base harder to access.


Use 4-Dial Locks
A 3-dial combination lock is better than nothing, but it is much easier to brute-force. Use a 4-dial combination lock for any base you care about.
Camo Nets Hide Shape
Camo nets help break up the shape of a wall, but they do not make your base invisible. Treat them as concealment, not real protection.
Camo Net Window Trick
Camo nets can be placed near windows to make it harder for players to see inside while still letting you watch outside.
This works best when your base is dark inside. Lights at night can reveal your position.
Upper Barbed Wire Is Better
Lower barbed wire can punish careless players, but upper barbed wire is usually more useful because it can make walls harder to climb over.
Barbed Wire Can Become Metal Wire
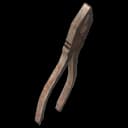
If you are struggling to find metal wire for a gate, barbed wire can be converted into metal wire with pliers.
This makes barbed wire useful even if you do not plan on using it as a wall attachment.
Check Lock Reach
Combination locks attach to a specific side of the gate. Make sure you can reach the lock before closing yourself inside.
Default Lock Codes
Combination locks start with a default code. Always set your code before attaching the lock, then double-check that the numbers shuffle after it is placed.
Base Utilities
Optional upgrades like lighting can make your base easier to use, but they can also reveal your position.
Generator Lights
- • Place a generator close to where you want the light.
- • Add a Spark Plug and fuel to the generator.
- • Hold a Construction Light and plug it into the generator.
- • Place the light within cable range, then turn on the generator and light.
Lights Can Expose You
Lights make sorting loot and defending easier, but they can also reveal that a base is active.
Be careful using lights near windows at night, especially if you are trying to keep the base hidden.
Base Building Tips
Practical building advice that helps reduce mistakes, improve security, and protect your loot from common raids.
When placing a fence kit, the soft side faces you and the hard side faces away from you.
The soft side allows inventory access and dismantling, while the hard side cannot be interacted with the same way.
Always place walls so the soft side points inward toward your base.
Fence, watchtower, and flag pole kits are placement tools. Once the foundation is built, you can usually pick the kit back up and place another layout.
If you have rope to spare, you can sketch a layout with kits before building foundations, then adjust the placement before committing materials.
This makes it worth testing placements before spending logs, nails, and tool durability.
When placing a kit, a white hologram usually means the placement is valid. A gray hologram means something is blocking the build, the ground is uneven, or you are too far away.
Before building a foundation, make sure you can complete every wall, frame, gate, platform, or stair piece you need.
If your placement rotation gets messed up, reset it and try again before spending logs, nails, and tool durability.
Avoid large open buildings with many entrances. Look for spots that funnel players into one or two predictable entry points.
Garage bases can be cheap, but they are common, predictable, and often vulnerable through gaps, windows, thin cover, or server restart door behavior.
Never rely on a single gate. Build multiple layers of doors or gates so one mistake does not expose your whole base.
If you die while opening a door, an airlock helps stop enemies from gaining full access.
Avoid using the same code on your front lock as the rest of your base. If the outer code gets compromised, your inner locks still protect you.
Layered fences can slow melee and firearm raids, but placing them too close together may not help much against explosives.
Leave space between layers so one blast is less likely to damage multiple walls or storage behind them.
Explosive damage can reach items and containers behind your outer walls.
Keep crates, explosives, and high-value storage away from exterior walls so one raid blast does not destroy your best loot.
Do not keep every valuable item in one base. A raid can wipe out your progress if all your best gear is stored together.
Keep hidden stashes nearby with backup tools, nails, repair supplies, guns, and ammo so you can recover after a raid.
Small groups should prioritize wooden crates, barrels, and sea chests because they fit well inside tighter building bases.
Larger groups can use tents for huge storage, but tents need more flat space and are harder to fit inside small buildings.
Cutting trees near your base can reveal your location to experienced players.
Trees can give multiple logs, but freshly cut trees around a hidden base are a giveaway.
Gather wood away from your base when possible, or use lumber piles to reduce noise, preserve tools, and avoid advertising your location.
Gates always open from a specific direction.
Bad placement can trap you inside your own base, especially if the combination lock ends up on a side you cannot reach.
Avoid placing gates directly in exposed openings when possible. Angling a gate can give you more cover while unlocking or entering your base.
If you find a lockpick, lock doors around your base to make the location less inviting to casual players.
Lockpicked doors can still be forced open, so treat this as a small deterrent, not real protection.
Flag poles are useful for larger bases, shared storage, and players who may forget to refresh items.
If your base is small and you regularly interact with your storage, a flag pole may not be worth the resource cost.
Base Building Video Guide
Watch a full beginner-friendly walkthrough showing how to build fences, gates, watchtowers, and secure bases in DayZ.
Related DayZ Guides
Base building connects closely with crafting, repairs, health, and general survival. These guides are good next steps.
Crafting Guide
Learn core recipes for rope, crates, tools, shelters, and useful survival items.
Repair Guide
See what repair kits, sharpening stones, duct tape, and tools are worth saving.
Health Guide
Avoid losing your base run to sickness, wounds, blood loss, or bad food.
DayZ Hub
Return to the full DayZ resource hub for more beginner and survival guides.